2x4basics Picnic Table Kit
Assembly Tips and Suggestions


The 2x4basics picnic table kit is an excellent product consisting of a set of plastic frames for assembling a picnic table and two benches.  Just add 2x4's.  By choosing whatever length 2x4's you prefer, you can make the table whatever length you wish up to 8 feet long.  The benches end up separate pieces from the table, which is unusual for a picnic table; whether this is a pro or a con is a matter of personal preference.  The bench tops are about 15" wide, considerably wider than most picnic table benches; they feel luxurious by comparison to narrower benches.

2x4basics picnic table - ad
          photo
Nobody in my area stocked this kit, but I found that Lowe's would order it for me -- and for a reasonable price, too.  Plus, by picking it up at their store, I didn't have to pay any shipping charges.  Picking the kit up is easy; the box isn't very big or heavy and will easily fit in the trunk of a mid-size sedan.  Picking up the lumber needed is a bigger job.

The graphic instructions are printed on the box:

2x4basics instructions on box

Pressure-Treated Wood:  Many picnic tables and kits dance around the issue of whether the wood used should be pressure-treated.  If the table is to be left outdoors, pressure-treated wood will be essential for durability.  On the other hand, you're presumably going to be eating off the tabletop, and having toxic chemicals in that tabletop wouldn't seem to be the best idea.  Some kits even suggest using pressure-treated wood for the structure but non-treated wood for the top surface.

My decision:  Pressure-treated wood throughout, and I'll use a tablecloth when eating off it.  If left outside the tabletop will be adorned with bird droppings anyway; you wouldn't want to eat directly off the wood.

Note:  Picnic tables and kits invariably use 2" boards.  Even when pressure-treated, 2" boards should never be left in contact with the ground; they will rot.  The little tags on the end of the boards make this clear.  For ground contact, you need to use pressure-treated boards at least 4" thick -- but nobody makes a picnic table kit that utilizes 4" thick lumber.  Many tables or kits use steel tubing frames that keep the wood off the ground; this is good for the wood, but obviously you need to be concerned about the steel rusting.  Galvanized steel is good, but even that will eventually rust.  The 2x4basics kit is arguably the optimum solution; the only thing touching the ground is plastic, which will never rot or rust.

Cutting Lumber:  The instructions provide lumber sizes for a 4', 6', or 8' table.  It is an accurate claim, though, that you can build it any size up to 8'.  If you choose to make your table and benches 8' long, you can just buy 8' boards.  6' boards are a bit harder to find, and 4', 5', and 7' boards don't exist.  To make your table 4', 5', 6' or 7' long, buy 8', 10', 12' or 14' boards and cut them in half.  Many building supply stores such as Lowe's or Home Depot will cut boards in half for you for free.  They'll balk at cutting each board into a dozen little pieces, but they'll happily cut each 12' board into two 6' pieces just to make it easier to load into your truck.  This means you can build this table without a saw!  Note that most lumber comes a hair longer than the specified length; a 12' board will often be 12'-1/2" long, for example.  Make sure to tell the guy doing the cutting that you want each board actually cut in half, so they'll end up 6'-1/4" each.


Tools:  The instructions on the box indicate you'll need a cordless drill or electric screwdriver.  There are 96 screws involved, so trying to assemble it with a regular Phillips screwdriver would be tiring.

You will want to have either a very long Phillips bit for that cordless drill or an extension, one of those 6" hex shafts with a magnetic bit holder on the end.  Most of the screws involved are tucked under a shelf so you can't really get the nose of a cordless drill in close enough to drive the screws straight.  Using an extension allows you to install the screws closer to perpendicular into the wood.

Planing:  If you own a plane, by all means use it! 
In a perfect world pressure-treated lumber would be perfectly flat and smooth, but in this world your finished table will have some high spots.

Wood Plane

Fortunately, a plane works like magic on soft pine; you'll be zipping long ribbons of wood off with ease.  In a matter of minutes, your table can at least be flat enough that drinks don't fall over when you set them down! 

You should also use a wood file or some sandpaper to smooth all the edges and corners so people don't get splinters.


The following are some ideas for assembling the picnic table and benches differently than the instructions describe.


Screws:  The 2x4basics kit comes with plated steel screws for assembly.  If the table is left outdoors, eventually these screws will rust -- especially if screwed into pressure-treated wood which is notorious for causing fasteners to corrode.  To do a better job here, I suggest doing an online search for "#10 x 1" stainless steel truss head screws".  I ordered a pack of 100 such screws for $6.06 with free shipping in 2014.  The 2x4basics table and two benches require a total of 96 screws, so you should end up with 4 left over.

2x4basics picnic table screws -
          plated on L, SS on R

This photo shows one of the plated screws that comes with the kit on the left, and a stainless steel screw on the right.  You can go with 1-1/4" or even 1-1/2" screws if you prefer, but there's really no need for the additional length.  When the pressure-treated wood rots (about 20 years from now!) you can just unscrew the SS screws and reassemble the table with new boards and reuse the old stainless steel screws.  They will still look just like the one in the picture
.

Assembly of the Bench Frames:  The frames of the benches are assembled with a single 2x4 inserted into the end supports to tie them together.  The 2x4 is fastened to each end support with two screws in the bottom and one in each side.  The screws in the sides tend to cock the assembly a bit cattywompus when tightened.  My recommendation:  Use a 3/16" drill bit to drill one hole in the plastic so that you can put both of the side screws into the same side of the 2x4.

Hole Drilled in Bench Support

Install the two side screws first, then the two in the bottom.  Don't put any screws into the other side of the 2x4; that would only stress the plastic unnecessarily.

The assembly of the table frame doesn't have the same problem.  Because two 2x4's are used side-by-side and you wouldn't be able to get at screws in between, the screws are already designed to all go into the same side (the outside) of each 2x4.

Structural 2x4 Insertion Into Supports:  The instructions as well as the photo at the top of this page show the 2x4's holding the supports together inserted only until flush with the outer surface.  As shown in the pictures below, I assembled my table and benches in that manner as well.  This results in some screws being screwed into the very edge of the sawn end of those boards, which is not really optimum for structural integrity.  To do this job a bit better, you might opt to insert the 2x4 completely through the support until it protrudes perhaps an inch or two out the other side.  To do this, you could cut those 2x4's a couple of inches longer -- or not.  Leaving them the same length just moves the supports inward an inch or so from the ends of the table and benches.

Wider Boards:  The 2x4 basics table and benches are intended to be assembled with 2x4's, and as shown in the picture above they work nicely in that configuration.  I decided, however, to use 2x8's for the tabletop and benchtops on mine.  This will typically cost slightly more, as a 2x8 costs a bit more than twice what a 2x4 costs.  But you end up with fewer gaps in the surfaces.  You will still need 2x4's to hold the frames together underneath.

2x4basics picnic table -- 2x8
          top

Wider boards aren't your only alternative, obviously.  There are all sorts of ways you could configure a top on your table and/or benches.  You could opt for those recycled plastic boards.  You could use oak or walnut or mahogany, if you can find suitable wood.  You could fashion a top that's a solid deck, no slots, perhaps screwing a sheet of pressure-treated plywood on top of the 2x4's.
  Or perhaps sheet metal or plastic.  Heck, you can install a marble countertop if you so choose.

Bench Length:  The instructions suggest making the table and the benches the same length, but the 2x4's holding the frames together should be 6" longer for the benches than for the table.  This means that the supports for the benches will be 6" farther apart
than the supports for the table and only 3" from the ends of the bench (Oddly, the table and benches in the official company photo at the top of this page don't appear to have been assembled according to these instructions).  Part of the reasoning there is that this makes it unlikely that anyone could sit on the very end of an empty bench and have it upend on them.  The more probable reason, though, is that this arrangement allows the benches to "nest" underneath the table when not in use.  If the supports were the same distance apart, the "toes" of the supports would bump into one another.  By spacing the supports for the benches farther apart, the toes for the benches sit outside the supports for the table when nesting.

I chose to make my benches a bit shorter than the table; I assembled my table 6 feet long but my benches are 5 feet long, and the supports remain 6" from the ends of the benches.  This enables the benches to nest with the toes of the benches inside of the supports for the table..  This picture shows the benches tucked under the table:

2x4basics picnic table
        with benches tucked underneath

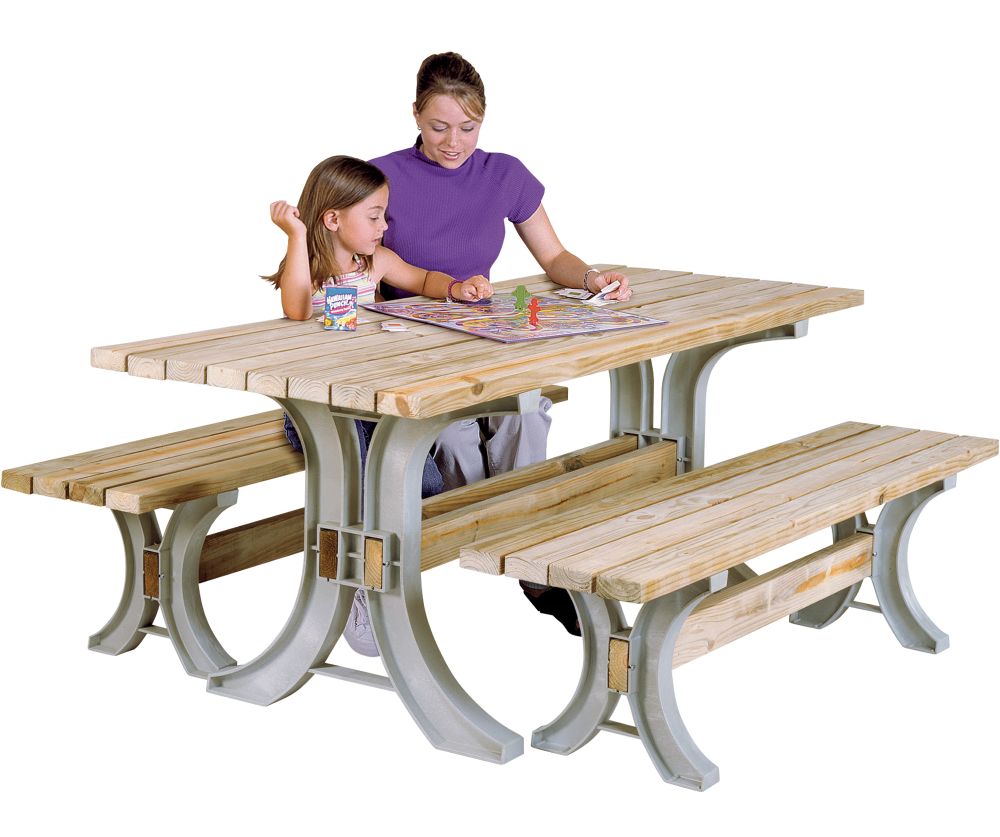
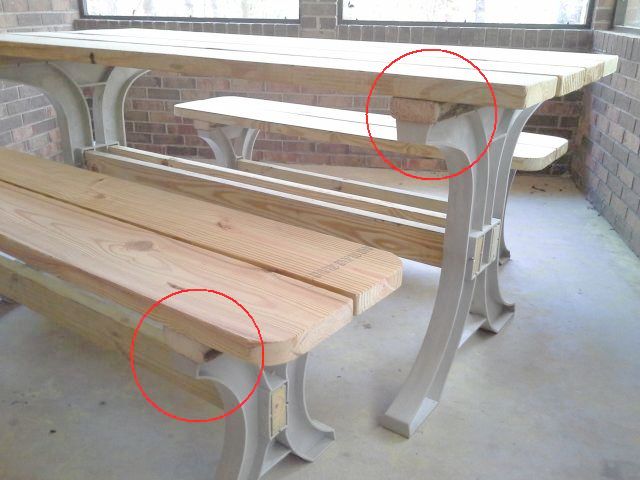
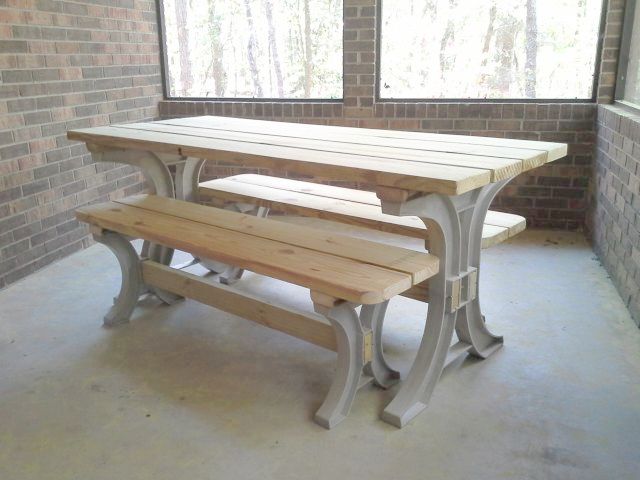
Going with shorter benches also facilitates making the table in half-foot lengths.  For example, if you want a 6-1/2 foot table, buy 12' boards and cut a 6-1/2 foot piece from each one for use on the top.  The remaining 5-1/2 foot piece is used for the benches.  Since the same number of boards are used in the top and the benches, there won't be any waste.

Height:  There is nothing short or small about the 2x4basics picnic table kit; the table and benches are as high as any conventional picnic table, and higher than many.  However, my wife and I feel that all picnic tables are too short and prefer them higher, so I customarily find a way to space them up a bit.  With the 2x4basics kit, this was easily accomplished by inserting 2x4's between the top of the supports and the top deck boards:

2x4basics picnic table
        with spacers for more height

For each bench you'll need two 2x4's 14-3/4" long.  For the table you'll need two 2x4's 30" long.  You will also need four 2-1/2" flush-head deck screws (stainless steel recommended again) for each board in the tabletop and benchtops; with the conventional layout of eight boards in the tabletop and four on each bench, you'll need 64 deck screws.  My layout using 2x8's only required 32 deck screws.

2x4basics picnic table - deck
          screw for installing height spacers

The photo shows an older stainless steel deck screw with a square drive head.  Nowadays deck screws more typically come with Torx drive heads.  That's good because the square drive idea really sucks, even worse than Phillips.

The assembly procedure changes somewhat as follows:  Assemble the frame, putting the supports together with the 2x4 struts in between.
  Lay all the top deck boards face down on the floor and spaced properly.  Set the 2x4 spacer boards down on the deck boards, then set the frame down on top of the spacer boards.  Move things around until positioned correctly, centered and aligned.  Lift off the frame, then screw the spacer boards to the deck boards with the deck screws.  Then set the frame back in place and screw it down to the spacer boards with the #10 x 1" truss head screws.  The heads of the deck screws will hence be hidden, covered up by the frame supports.

Rounding Corners:  2x4basics offers a template for making the ends of the table and benches rounded.  Rather than go that way, I simply used a screw-top lid off a jar to mark all four corners of each bench and rounded off the corners with a saber saw.  This greatly reduces the incidence of bruised shins when sitting down.  I think it looks good; you can see for yourself in the photos above.  I could have done exactly the same thing with the table top easily enough, but my wife prefers square corners there because a tablecloth hangs straighter.

The "Family Reunion" Option:  You could combine two of these kits to make one table up to 16 feet long -- the longest 2x4's you can normally find.  Use three table supports, one on each end and one in the center.  The structural 2x4's underneath, 15 feet long, should slide right through the center support and get screwed in place.  Of course, you'd end up with one support left over -- which means you could make 2 such long tables using 3 kits.  Or you could opt to put all four supports under one long table for more strength.  You could assemble extra-long benches in the same manner, but really it'd probably be a better idea to assemble four separate benches to use alongside your extra-long table.

If you're only going to have one family reunion, you can assemble this 16' table with all four supports with the two inboard supports carefully located, and then after the reunion use a circular saw to separate it into two 8' picnic tables in about 10 seconds.