MAYTAG / WHIRLPOOL WASHER BRAKE
In 1985, we purchased a Maytag washer and dryer set.
Recently, the transmission in the washer dumped its oil out the
bottom, making a royal mess all over the floor and all over the
belts and pulleys on the bottom of the washer. We actually
cleaned the oil off the belts and pulleys and kept using it for a
while; it kept right on working, although it was getting pretty
noisy.
After shopping for a new washer and dryer for a while, we decided
to fix the old washer instead! A replacement transmission is
readily available online (an orbital to replace the original
helical). In the course of rebuild, we discovered the washer
brake was also in need of replacement, but that is also readily
available online. All told, the parts were considerably
cheaper than a new Speed Queen -- the only decent washer we found
on today's market -- and we weren't interested in any of the other
cheap junk out there, including today's Maytags. Our old
dryer, which had been repaired a couple of times before -- new
motor, new heating element -- was still working fine.
The Maytag / Whirlpool brake assembly is a clever
contraption. After disassembling my old one and figuring out
how it works, I decided to post this page for others who might be
curious.
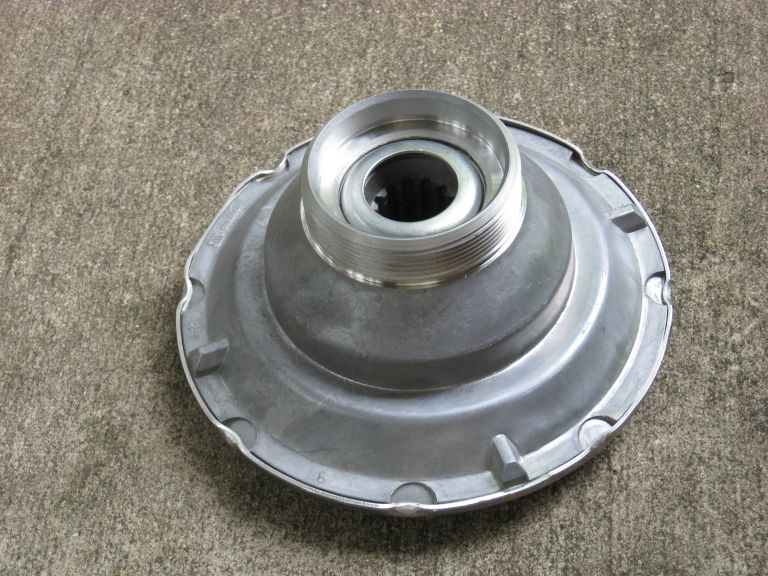
The new brake assembly is part number 6-2011900:
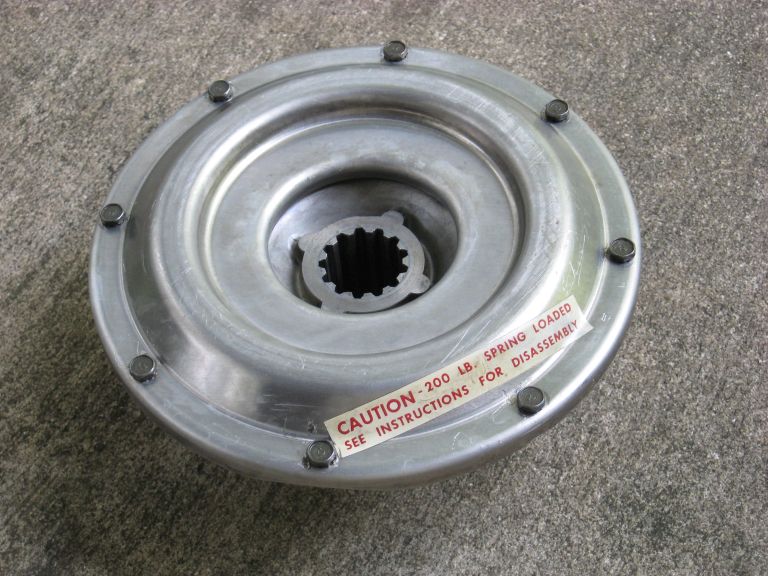
The old one was exactly the same except that it was held together
with screws instead of having the edges crimped.
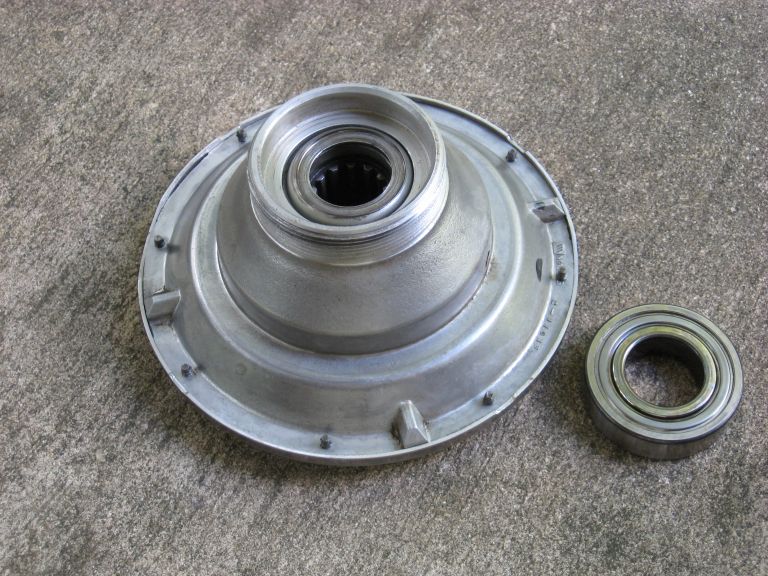
The brake assembly also serves as the bearing holder for the lower
bearing supporting the transmission. The ball bearing, shown
in the photo above, is installed in the recess in the top of the
brake assembly prior to the brake assembly being screwed into the
tub support in the washer.
The brake assembly is spring-loaded, so a sticker is applied to
the old one warning to be careful when disassembling. With
the new crimped model, disassembly isn't as tempting, but there is
still a warning stamped into the sheet metal saying "Caution:
Spring Loaded - Do Not Disassemble". If you do choose to
disassemble one, as I did, you will want to take
precautions. If you have a really big vise, you can remove 3
screws, clamp the assembly into the vise and then remove the
remaining 5 screws. Carefully open the vise, and the brake
assembly will open up with it. If you have a bunch of screws
of the same thread only 2 inches longer, you can replace one screw
at a time with the longer screws, and then back out all the screws
progressively to gradually back the cover off. It wouldn't
be a bad idea to run a cord through the middle and around and tie
it into a loop to prevent parts from flying around if anything
goes wrong. But perhaps the easiest and safest method would
be to visit your local AutoZone and take advantage of their loaner
tool program to borrow a spring compressor. Insert the
spring compressor through the middle and tighten it down, remove
all the screws, then gradually release the spring
compressor. You might have to remove one or two screws
before applying the spring compressor.
If you're looking to disassemble the crimped type brake assembly,
I suppose the same ideas would apply except you have to carefully
unfold or grind away the crimps to get it open. To
reassemble, I suspect you can just rotate the cover a few degrees
to recrimp fresh metal.
Here's the exploded view of the brake assembly:
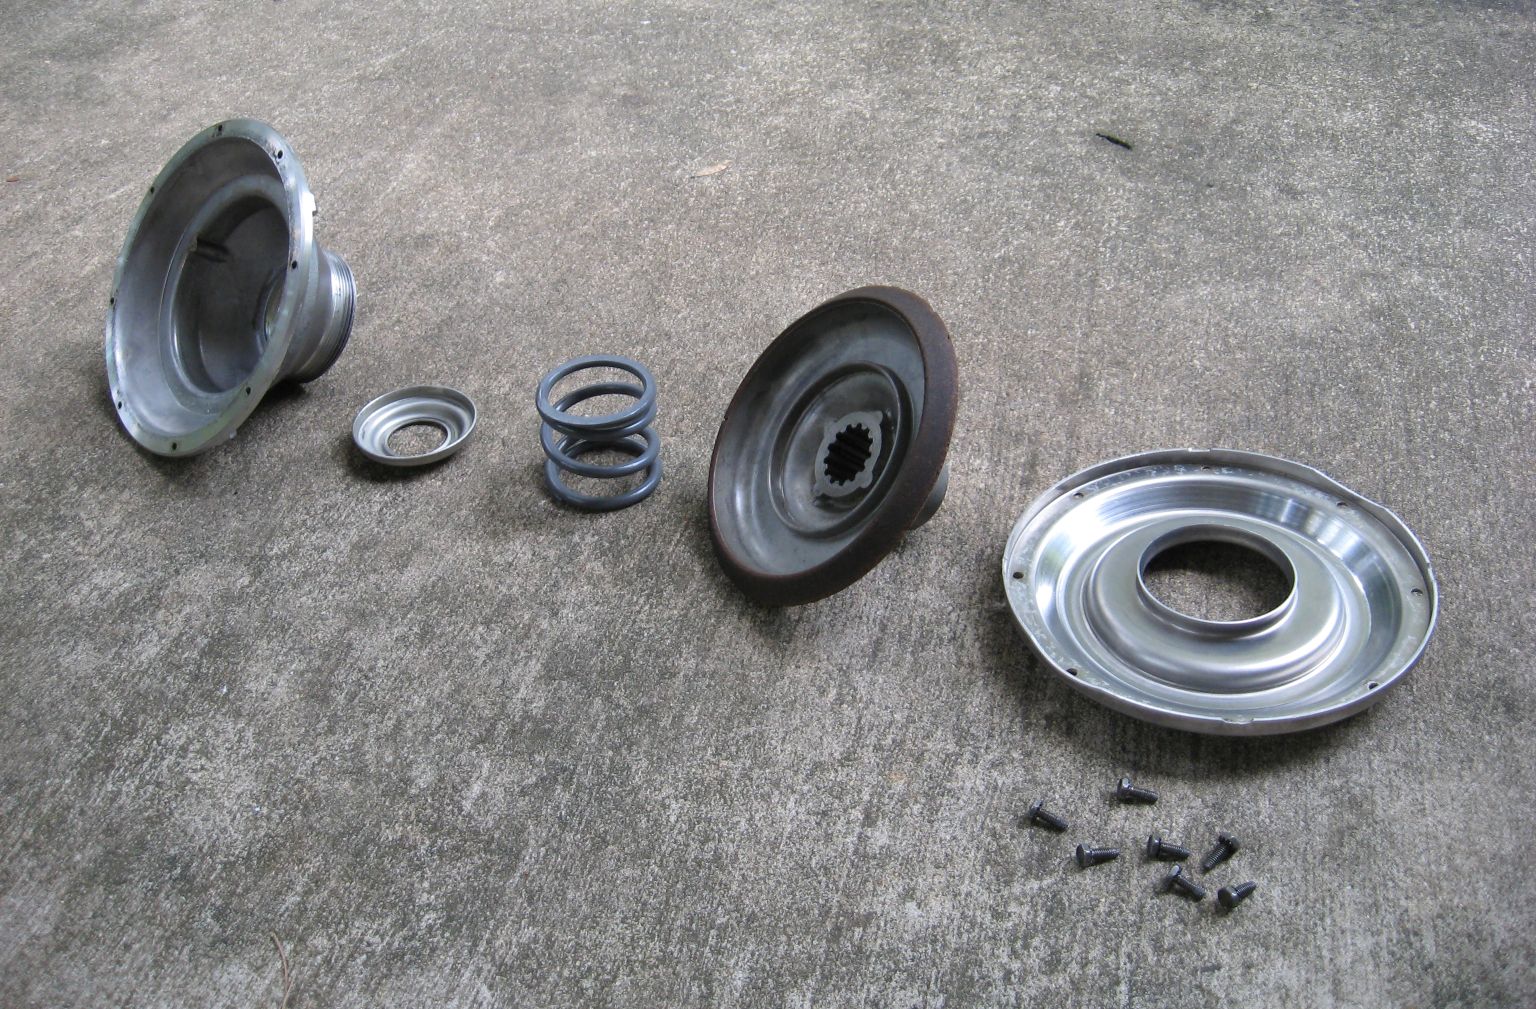
From left to right, I'll call these parts the brake housing,
spring seat, spring, brake disk, and brake cover with
screws. One screw didn't make it into the photo for some
reason. There was also a circular gasket for the bolt
flange, but it was oil-soaked on mine (it's supposed to be dry!)
and it came out in pieces, so I didn't include it in the
photo. Note that the brake disk has a brake lining bonded to
the outer edge, and it slides against a surface in the
cover. The spring applies the brake, meaning the brake is
normally engaged; when the motor turns the large pulley on the
bottom of the transmission, it winds up a corkscrew shaft and
presses the brake disk upward, disengaging it. There's a
ball bearing on the pulley itself allowing it to turn against the
center of the brake disk without friction or galling. As
long as the motor is running, it keeps the brake disengaged and
the wash tub spins. As soon as the motor shuts off, the
brake reengages to bring the wash tub to a prompt halt.
So far, simple enough. Let's get to what's clever about this
design. The brake disk rotates with the washer drum; it is
splined to the bottom end of the transmission. The housing
and cover are both stationary. That means that somewhere
between the disk, the spring, the spring cup, and the housing,
something's gotta slip. With the spring pushing these parts
together, they will not want to slip.
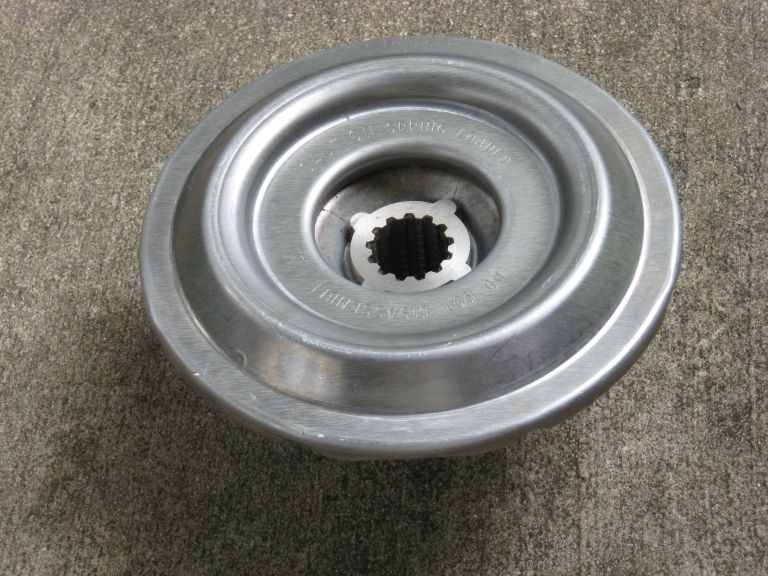
If you'll look more closely at the opening where the bearing is
installed, you'll see the center portion of the spring cup.
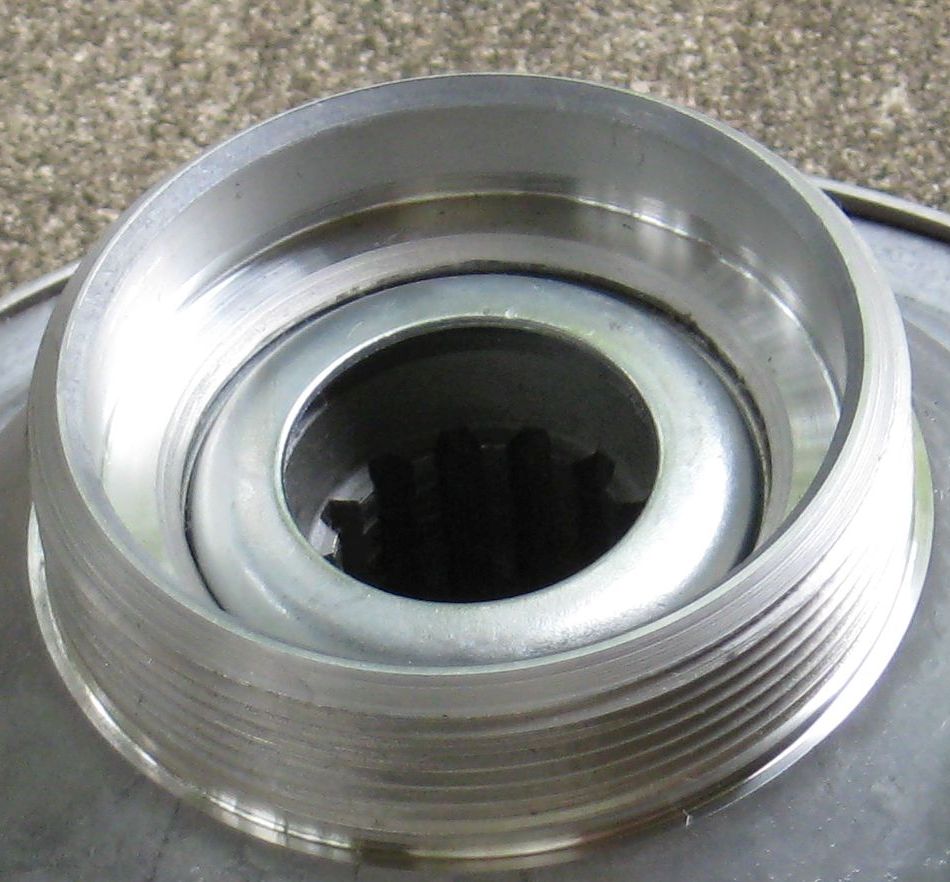
Note that the spring cup sits higher than the bottom shelf
of the bearing recess. As a result, when you slip the
bearing into this recess, it won't go down all the way; it runs
into that spring cup and sits with part of the bearing still
sticking out of the housing. As you thread the brake
assembly into the tub support on the washer, the bearing will
contact the surface in the recess in the tub support. As you
continue to tighten the brake assembly, the bearing will get
pressed down into the brake assembly, pushing that spring seat
along with it. This will lift the spring seat completely off
the inside of the brake housing. So, when fully installed,
the spring seat is only in contact with the inner race of the
transmission support bearing. Since that inner race rotates
with the drum, that means the brake disk, spring, spring seat, and
inner race of the bearing are all rotating together. Hence,
there should be no friction or wear between them.
I recommend carefully cleaning the threads on the brake assembly
and the tub support, and then applying anti-seize compound
(available at auto parts stores) to the threads prior to
installing this brake assembly. When installing, the brake
assembly should spin freely in the threads for several
turns. Then you should be able to feel the point where the
ball bearing makes contact with the tub support, and further
tightening is compressing the spring inside the brake
assembly. Then after some more turning, you should clearly
feel the threading come to a hard stop when the ball bearing hits
the bottom of the recess in the brake housing. It's a good
idea to get it pretty tight, but that's nowhere near as important
as making sure it's actually threaded on all the way! It is
imperative that the threads not be bound up or jammed prior to the
brake assembly being screwed all the way in.
By the way, I didn't buy the fancy tool number 038315. I was
able to get the old brake housing off using a hammer and a drift
on the four lugs on the back side. When reinstalling, I just
gave it a few taps to make sure it was snug. It's the little
locking tab, installed with a small bolt, that really ensures it
stays put.
Now let's talk about what was wrong with my brake assembly.
The spring cup looked like this:
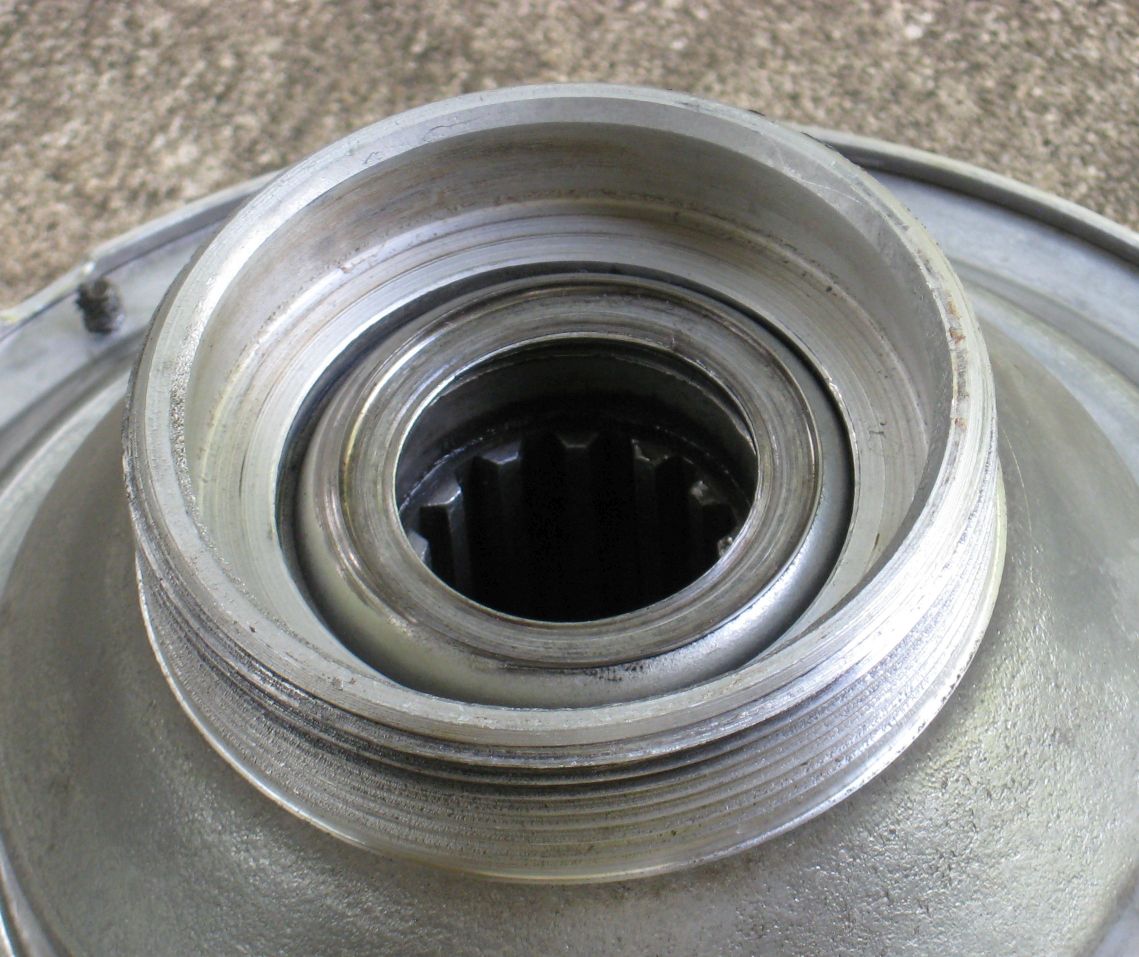
It's worn very badly indeed, as you can see. It's as though
the spring seat has been grinding hard against the inner race of
the ball bearing. Thing is, these parts are supposed to be
rotating together, so there shouldn't be any wear at all.
What could cause relative motion and wear?
One possibility might be a seized bearing. If the bearing
locked up, the washer tub could keep right on turning by the shaft
of the transmission spinning inside the inner race of the bearing
-- it's not splined like the brake is, it's just a slip fit.
Thing is, though, my bearing seems just fine -- in fact, I
reinstalled it.
Another possibility is that something has jammed the spring seat,
preventing it from rotating with the brake disk. A chunk of
dirt getting in there might have fouled it; I didn't notice any
such chunks during disassembly, but since everything was covered
with oil I was preoccupied with minimizing the mess. It's
not obvious how any chunks would get in there, unless they were
accidentally dropped in during the original build.
Or, perhaps it wasn't installed correctly; if the brake hadn't
been screwed in properly, the spring seat wouldn't have been fully
lifted off the inside of the housing, and dragging against the
housing might cause it to start fretting against the bearing inner
race. This problem would compound itself, as the wear shown
in the picture would reduce the lift of the spring seat
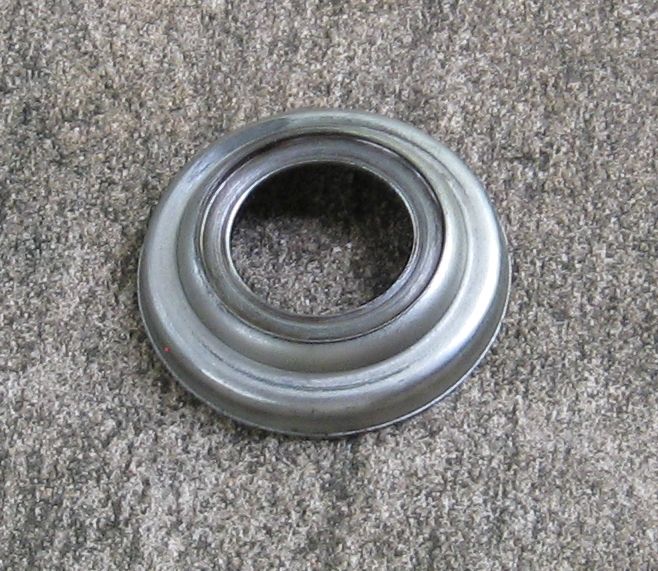
and cause it to drag even more. In the photo above of the
seat itself, there's a worn spot at the upper left where the seat
has been rubbing against the inside of the housing, which would
seem to support this hypothesis -- but, on the other hand, that
could be a result of the damage rather than the cause.
The brake certainly seemed to be screwed on tight; I had to do a
reasonable amount of pounding to get it loose.
So, what actually caused this damage? I have no idea.
I only know that it's toast, a new brake is called for. If I
could buy the spring seat separately (79-cent part!) I could
rebuild the brake assembly good as new, but I didn't find
individual parts of this brake assembly online.
It might have been possible to rebuild and reuse this brake
assembly by milling or grinding that worn area of the spring seat
flat and parallel, reassembling the brake package, and then
reinstalling it with a spacer between the spring seat and the
bearing. The spacer would need to have the same ID and OD as
the inner race of the bearing, and it'd need to be roughly the
same thickness as the wear and milling had removed from the spring
seat since new. Suitable
spacers are available commercially, possibly locally at
hardware or bearing stores or Grainger,
or you could just fab one out of shim stock. You'll need to
have the transmission (or a dummy shaft) in place while screwing
the brake assembly into the tub support in order to hold the
spacer centered.
I do wonder if this brake damage was the cause of the noise the
machine was making. Yeah, the oil had drained out of the
transmission, but those gears are encased in an aluminum housing
and are probably still fairly well-lubricated by a film of oil on
the surfaces of the parts. I wouldn't expect the
transmission to be making much noise. With this spring seat
dragging, though, I'd expect it to make all sorts of racket, and
that racket would resonate through the spring and the brake
housing.