GOUGE SHARPENING AND MODIFICATION
In these pages I present a discussion on sharpening and modification of
gouges,
also known as linoleum cutters or cutters for block
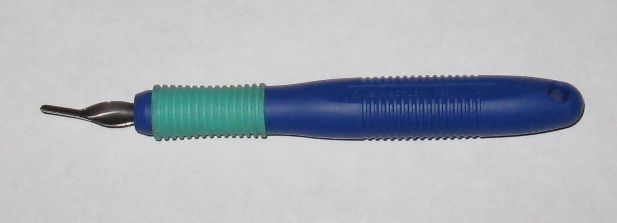
printing. The most commonly used tools of this sort are the
Staedtler 1V (shown above) and the Speedball #1, although these
guidelines also work with other V-shaped carving tools such as
the Staedtler 2V and V-shaped woodcutting tools. I'll go into
excruciating detail to
make the process as clear as possible, and apologize for how lengthy it
is.
Below, I describe how to sharpen one of these gouges as well as a minor
modification.
On separate pages I describe how to perform three popular major
modifications,
pinching, miniaturization
and reversing.
WHAT YOU'LL NEED: Being
able to clearly see what you're doing to the tip of your gouge is
imperative, so you're going to need all the magnification and lighting
you can muster. If you have good eyesight, drop into your
neighborhood Dollar store and pick up a pair of +3.50 or stronger
reading glasses
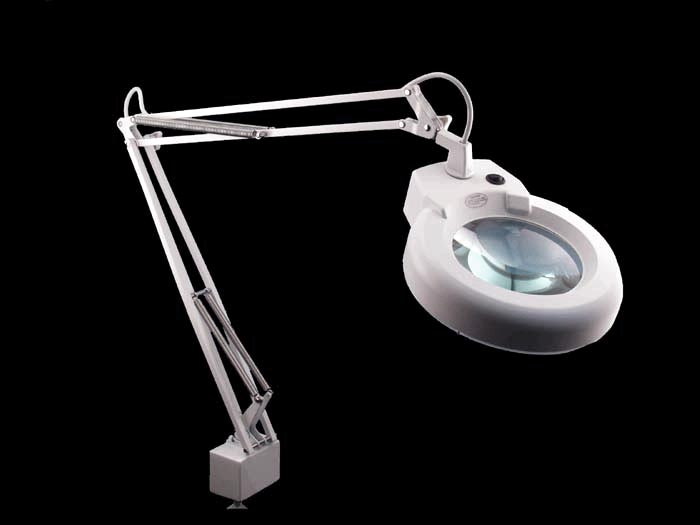
for a dollar. If you need glasses to see normally you won't be
able to put cheap reading glasses on top of them, so you'll need to
resort to a magnifier on a stand or something else.
Besides good magnification to see what you're doing, it's also helpful
to have great magnification
to inspect your finished work. If you have a jeweler's loupe or
similar 10X magnifier, that'd be good.
You will need a very fine knife hone; a common "knife sharpening stone"
won't do, they are usually far too coarse for this job even if they
have a side described as "fine". There are
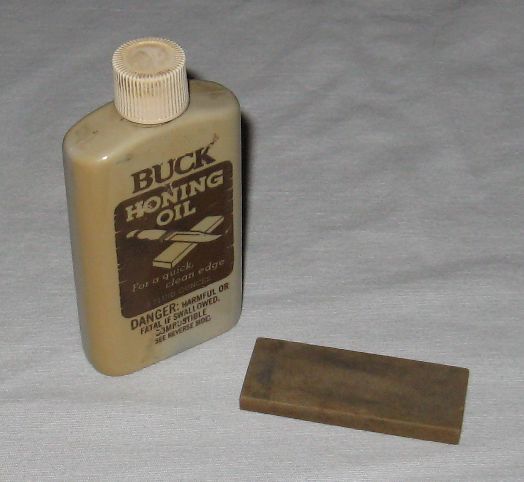
several ways to obtain a suitable hone. You can get what's
called an "Arkansas stone", which is sold in fine knife stores; an
Arkansas stone is typically used after a regular stone when sharpening
knives because it is very fine-grained and applies a very smooth
finish to the cutting edge. An Arkansas stone may be difficult to
find, though. If you get one, be sure to get some honing oil to
use with it. They sometimes are sold together -- along with a
coarse stone -- as a "knife sharpening kit".
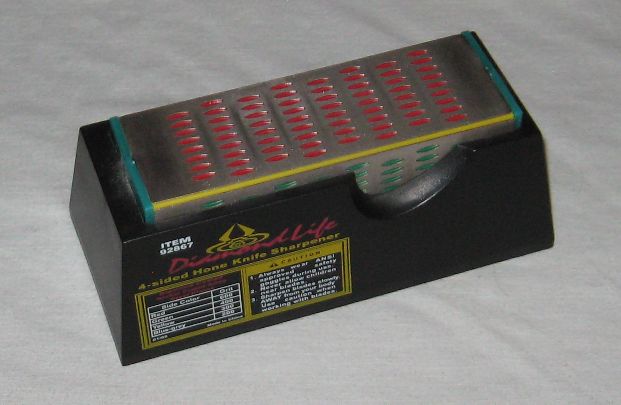
Another route would be to purchase a diamond hone for sharpening
knives, but
you need to make sure to get a very fine one, 600 grit or
thereabouts. Harbor Freight Tools sells a couple of models,
including some with three or four grits on the same block. The
problem with these things is that they typically have rows of holes all
over the surface, which may help sharpening knives somehow
but it just causes grief honing gouges. Still, often such
diamond hones will have a flat area uninterrupted by holes at each end
that's large enough for our purposes.
Contrary to the Arkansas stone, a diamond hone works best dry. A
diamond hone also seems to get finer with use, apparently as the high
points of the grit get broken off the surface, but it keeps on
working. It actually works a little better for this task after
it's been worn a little bit.
Yet another way to go would be to use a piece of 600-grit sandpaper
taped
down onto a flat surface such as a piece of glass. This may sound
like the quick and easy route, but it's more difficult to obtain a good
edge with sandpaper. If at all possible, the above two methods
are preferred. If you choose to use sandpaper, be sure to pull
your gouge across the sandpaper rather than push it; pushing can cause
the sandpaper to curl up a bit just ahead of the gouge and dull it
rather than sharpen it.
There are other ideas that might work. A ceramic or stone coaster
might work -- that's right, the disc your drink is sitting on while you
read this. It must have a flat surface and a fine grain --
ceramic will usually be smooth enough, but many of the stone coasters
are too coarse. The surface obviously can't be
coated with paint or glazing. If it's painted or engraved on top,
you might
try flipping it over and peeling that cork layer off the bottom.
Using the bottom is also less likely to incur the wrath of your
significant other for ruining one of your coasters.
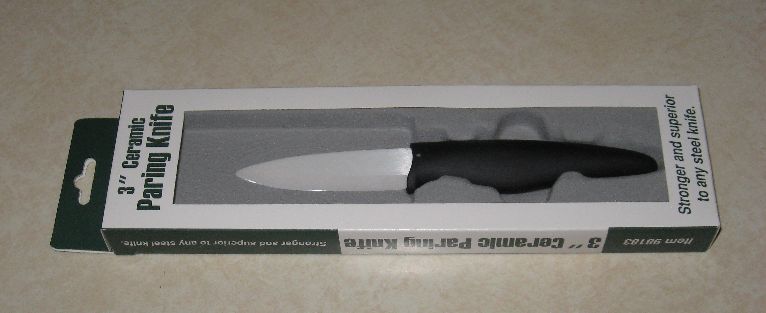
Besides the hone, you will also need a ceramic knife. It's
possible you've never heard of such a thing; they are a fairly
recent technology. Basically it's a knife with a blade made of
bright white ceramic rather than steel. The reason: ceramic
is much harder than steel, so it will hold an edge better -- and for
this task, it means it can be used to hone the inside edge of your
hardened
steel gouge without the knife itself getting polished instead.
The good
news is that you can buy a ceramic knife at Harbor Freight Tools.
They carry three sizes, a 3" paring knife, a 5" utility knife, and a 6"
chef's knife. Any size will work here, but once you have this
knife you'll want to put it to use in the kitchen, too -- trust me,
these are great knives -- so
choose the
size that would best fit your kitchen needs.
You can also buy a ceramic knife at Walmart. Side note: A
ceramic knife will cut most anything, and that includes your fine
china! Don't use one as a steak knife -- you'll notice that
Harbor Freight Tools doesn't offer a steak knife version -- because
diners would be cutting your plates as well as the steak. Use a
ceramic knife only on a cutting board or similar surface.
If you can't find a ceramic knife the only possible substitute known is
a
Flexcut Slipstrop, which is a honing kit designed specifically
for sharpening carving tools.
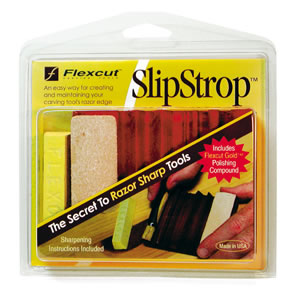
I haven't used one, but I
understand
they are made of wood and use a fine rouge or polishing compound to
provide a cutting
action. What's important here is that it have a razor-sharp edge;
a sharp edge is essential to make your gouge better rather than worse
when
sharpening. If the wood in the Slipstrop has a sharp edge that'll
be good, but if that edge gets dull with use you're either
going to have to figure out how to sharpen it or keep buying new
Slipstrops every now and then. It's probably cheaper and easier
to buy the
ceramic knife, since it'll last essentially forever -- and if it does
get dull, you can sharpen it with a diamond hone (but not an Arkansas
stone; rub your ceramic knife against an Arkansas stone and the stone
loses!).
There is one other thing you might want to make
use of, and that's a
grinder of some sort or another. Something powered by
electricity. Basically, anything with a flat grinding surface
will do, and that includes a drill or Dremel with a flat disk chucked
up in it. Honestly, if you're only working on one or two
gouges, a power tool is scarcely worth the trouble; it's more
important when Webfoot ships you a box of 120 gouges she wants
modified! For just a couple of gouges, you can accomplish the
same tasks by hand using the various honing tools described
above.
Using one of the coarser grits on a diamond knife hone works especially
well. So, in the instructions that follow, when it says to use
your grinder, remember that you can just do the job by hand if you
prefer. If you are
using a powered grinder, please note that the tip of a gouge is pretty
tiny and will overheat quickly if you're not careful. Always have
a cup of water handy and dunk it regularly during grinding to keep it
cool.
INSPECTING YOUR GOUGE: If
we could presume that your gouge was properly shaped at the factory, we
could proceed directly to sharpening. Experience has shown,
though, that a large percentage of both Speedball and Staedtler gouges
were not properly shaped at
the factory. So, using strong magnification -- a loupe or other
10X magnifier if you have it -- and good light, look
at the tip of your gouge. There are two common faults to look
for: First, are the two sides of the cutting edge the same
length? If
one protrudes forward farther than the other, we'll have to fix that
before we proceed.
The other common problem is the profile of the
cutting face when viewed from the side; the actual cutting edge should
form a straight line. If it seems to round the corner at the
bottom of the V, we'll need to fix that, too.
Note that the bottom of the tip, below the actual cutting edge, is
typically rounded. This is not a problem. It's when the
cutting edge itself curls back toward the handle that's the
problem. In other words, the grinding done to round the area
below the cutting edge went too far.
What follows is a
procedure for cleaning up that tip so it's straight before
sharpening. If you happen to be one of the lucky souls with a
gouge that was shaped right to begin with, you can skip down to
"SHARPENING" below.
CREATING A PROPER TIP:
The following process will fix
whatever's wrong with your gouge short of having been run through a
garbage disposal. Step 1: Holding the handle (not the tip!)
perpendicular to the grinding surface, grind the front of the nib a
little bit.
Looks like you're ruining your gouge, doesn't it? Aaaaack!
After you've ground just a bit, take a look at it end-on with a light
positioned to reflect off the tip. The
grinding
you have done will have created a shiny area -- or perhaps two shiny
areas. If you had the rounded bottom problem, you'll probably get
shiny spots at the top of the V, but they don't connect at the
bottom. If you had one side longer than the other, you probably
got a shiny spot on that side only. You need to continue this
grinding until the shiny area forms a complete V. Don't go
overboard and try to make it a pretty or uniform V, only go far enough
that there
are no gaps in the V. It will probably look something like this:
Now, for Step 2 you will grind
the outside along one side of that V parallel to the inside surface of the tip:
You need to know more than this illustration shows, though; you need to
know how steep to make that cut. The best way I can describe it
is: With the side of the tip against the grinding surface, the
butt end of the handle should be about 2" to 2-1/2" above the grinding
surface.
This is presuming a Staedtler handle, which is about 6" long overall.
Don't try to grind the side of the gouge all the way to a sharp edge
just yet. For one thing, if you're using a powered grinder,
you'll most certainly burn the metal; the thinner the edge gets, the
easier it is to overheat it. For now, just put a nice bevel on
the outside surface of the gouge while leaving a narrow band of the
original shiny surface remaining.
Now, obviously, flip it over and do the other side the same way:
When you're done with these flats, the gouge viewed from the side
should have a flat that looks like this:
Note that if the ground surface isn't shaped pretty much like that, you
probably did something wrong.
Next, hold the gouge right side up with the bottom of the nib against
the grinding surface, with the end of the gouge almost flat against the
surface -- just slightly nose-down, so the tip contacts first.
While holding this position, grind just enough to create a flat on the
bottom that is shaped like an elongated diamond. Do not, repeat DO NOT grind enough that you break
through to the inside of the V at the tip! You do want to grind
until the elongated diamond you are creating extends right up to
the front of the nib, though, where the two sides you ground meet at
the bottom of the V.
Note: Both Staedtler and Speedball nibs come with the bottom
ground to a rounded shape. In cutting this flat, I am
recommending a departure from the original configuration. I have
tried both ways, with a flat bottom and with a rounded bottom, and in
my opinion the flat bottom works as well or even slightly better; the
gouge has less tendency to fall into the groove you just cut.
It's also much easier to grind a flat than a curved surface. You
may, however, opt to roll the gouge side-to-side during this step to
round the bottom the way the manufacturer did it.
After you've finished this step, you're done with the grinder for
now.
SHARPENING: Hold the
gouge with the tip against the surface of the hone and rolled onto one
side, so that one side of the V is flat against the hone. The tip
of the handle should be perhaps 2-1/2" to 3" above the honing surface,
which you'll note is a bit higher than it was held in the grinding
steps described above. This will have you honing just at the
cutting edge rather that trying to move the entire bevelled surface.
The trick here is to have good light and good magnification to see what
you're doing, and hold the gouge in one hand and the hone in the
other. Firmly establish the position that you will be holding
both. Bring them together and begin a honing motion (back and
forth, circles, doesn't matter much) without changing those
positions. Periodically stop and look at the polished area you
have created, making sure that it is uniform along the edge and not
concentrating too much at one corner or the
other. If you find you've been leaning a bit crooked one way or
the other, adjust and continue.
If you have ground a new tip on the gouge as described above and left a
narrow strip of the flat front face during grinding, now is the time to
bring that
bevelled surface all the way to meet the inside surface of the V.
Note that as you get close to the inside surface of the V you need to
be applying only very light pressure on the hone. Too much
pressure will push the thin edge right over. Even if it doesn't
permanently deform it, it can bend it enough that the hone isn't
creating the edge you're looking for; it's not polishing the edge
itself because the edge has moved out of the way. Very light
pressure is the secret to success here; let the hone and the motion do
the work, don't try to rush it or force it.
Note: If you have experience sharpening knives, you're probably
alarmed at how steep these angles are. If you honed a knife at
similar angles, it would end up with a pretty blunt edge indeed and
wouldn't cut well at all.
If you try to use the shallow angles commonly used in knife sharpening
on a gouge, you'd end up with a very sharp gouge -- and you'd
bend the edge over as soon as you tried to carve with it. The
cutting
edge on a gouge nib needs to have comparatively blunt angles to
be strong enough to push into rubber and pry pieces out without getting
damaged. The fact that the tip doesn't have that razor sharpness
you get from honing at shallow angles isn't a problem because it's not
difficult to push a gouge through rubber anyway.
Obviously, once done with one side of the V, roll the gouge the other
way and do the other side.
Once you have both sides honed to form an actual cutting edge at the
face of the V, you will know perfectly well how to hold the gouge with
one side or the other against the hone while rubbing. Now do one
more trick: While holding one side of the gouge against the hone
and rubbing, slowly roll the gouge over to the other side, continuing
the honing motion all the way. Keep the handle at about the same
height through this process. When honing a Staedtler, the entire
roll should take no more
than a few seconds; it takes a bit longer on a Speedball because the
bottom of the V isn't as crisply formed. When done, you can look
at the bottom of the
V and see what you've done. This step will round the corners
where the flats on the sides and the elongated diamond flat on the
bottom meet. This is a minor and quick step, but it makes all the
difference in how well your gouge will carve because it's this area
that slides across the rubber when carving.
The next step is to take your ceramic knife and position the edge of
the knife down in the bottom of the V. The tip of the knife
should be pointing toward the handle of the gouge. With the
ceramic knife held in this position, roll it until one side of the
knife is sitting flat against one side of the V of the gouge.
Slide
the knife in and out of the tip of the gouge a couple of times; the
blade will probably come close to contacting the handle of the
gouge. You may notice a gray smudge appearing on the white
ceramic knife; that's metal particles being rubbed away. Roll the
knife over the other way and polish the other
side of the V the same way. And, just for good measure, stand the
ceramic knife up straight, centered between the two sides of the V, and
make a few more in-and-out sliding motions with the sharp edge of the
knife working on the bottom of the V only.
This treatment with the ceramic knife only takes ten seconds or
so. Two or three slides each way is plenty. It absolutely
must be the last thing done
to the cutting edge of the gouge, though. If you decide the work
on the outside isn't
quite right and you want to go back and hit it some more, be sure to
repeat the inside honing with the ceramic knife when you're done.
A MINOR GOUGE MODIFICATION:
Your
gouge
is
done,
but I recommend one more step. Hold your
gouge with one side of the tip against a grinder or hone (either works
here) as shown:
You'll need to use the corner of a grinder or hone for this task,
because you need to get down low enough that both the broad part of the
nib and the handle would be contacting the grinding surface.
Grind away the side of the tip as shown. When viewed from the
side, the resulting flat will be a triangle with a long straight side
along the top edge of the gouge tip and the peak pointing
downward. The forward end of this triangle should not meet the cutting edge!
Get it up close to the cutting edge and quit. Obviously, repeat
for the other side.
These cuts do not affect the cutting edge at all; the cutting edge is
not involved -- that's why it doesn't matter if you use the hone or
grinder. What this modification does is make the tip visibly
narrower, which means it's easier to see what you're carving because
there's less gouge in your line of sight. You'll be surprised at
how much it helps. And it's quick and easy to do.
The completed gouge should have 5 "facets" around the outside.
Two triangles, two trapezoids, and one elongated diamond.
You're done. Using a scrap piece of carving rubber, take a couple
of trial cuts and see how it works. I usually start by jamming
the tip deep into the rubber to clean it; pull it out of the rubber
and it leaves smudges of metal particles all around the cut. If
you have a jeweler's loupe or similar 10X magnifier, you can inspect
your work. The important thing is that you haven't left any of
the original shiny flat face, which would be dull. It's pretty
easy to
tell if you have, though, by holding the gouge in such a way that your
light would shine on it. When there's no more shine, you know
you're looking at a sharp edge.