Rubber Stamp Materials
There are several materials you will need to make a rubber
stamp:
- Rubber
- Foam
- Wood
- Glue
- Parchment
- Acetone
RUBBER
You need rubber, and it has to be solid rubber, not foam.
The two most common sources are erasers and
rubber specifically intended for stamp carving. Some
people use gasket material for plumbing fixtures which is dirt
cheap at Home Depot, but it's very hard to work with and not
recommended for the beginner.
The rubber needs to be flat on top and bottom, so a new eraser is called
for. It helps to pick the right eraser, since many are
crumbly or otherwise poorly suited. You'll
find that light, solid colors are important; dark colors or
elaborate patterns make it harder to see the image you've inked
onto the surface to guide your carving.
You may be tempted to just run right out and buy some erasers
and get started. Resist that temptation and buy some
rubber intended for carving instead. The rubber texture
and quality truly is better for this task, it removes the size
limitations that erasers impose, and the cost per square inch is
about the same as erasers and sometimes less.
I'll describe the materials I'd recommend first, followed by the
materials I would not
recommend. The latter list is far longer.
MATERIALS TO CONSIDER:
If you have a Michael's
or an A. C. Moore nearby,
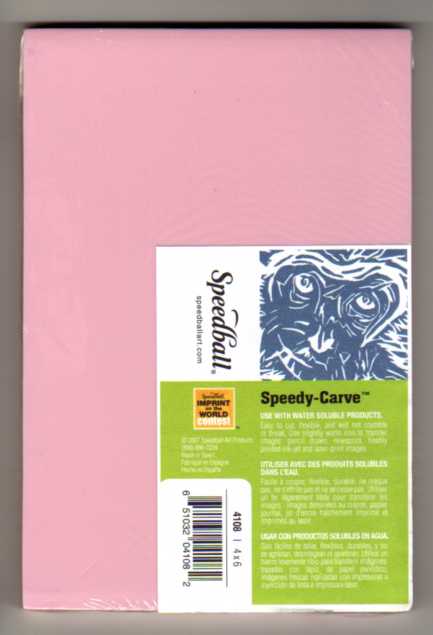
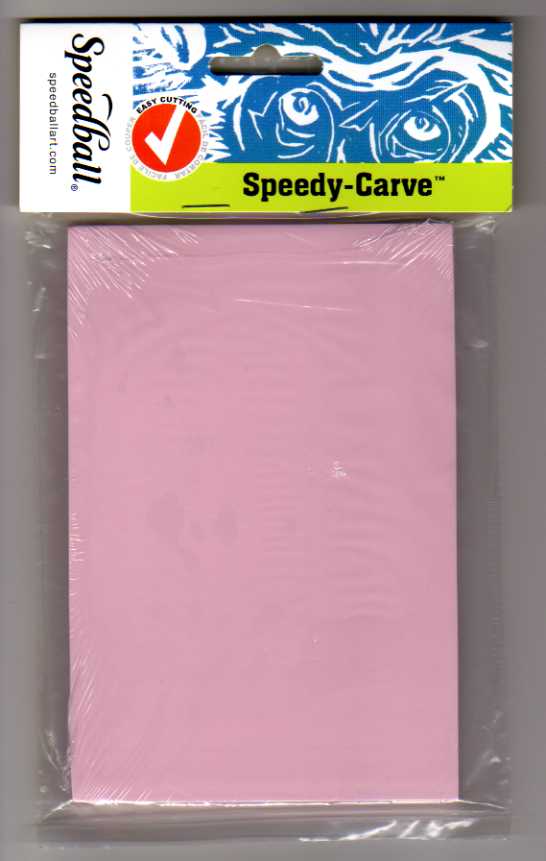
you can buy Speedball Speedy-Carve which is 1/4"
thick and pink. Letterboxers
commonly refer to it as "the pink stuff", and it is commonly
regarded as very good for rubber stamp carving.
Speedy-Carve comes in a 4" x 6" block in a clear cellophane
wrapper...
...and sometimes that clear cellophane-wrapped rubber is in a
bag that can hang on a pegboard.
(the label on the cellophane is still there, it's just on the
back side)
Note that none of the hobby/craft stores seem to think
Speedy-Carve should be sold alongside the rubber stamps.
It's found in the artist supplies, which in a Michael's is waaay
over on the opposite side of the store from the rubber stamps.
Speedy-Carve used to be called Speedy-Stamp. No idea why
they changed the name.
Speedy-Carve is also available in a larger block, 6" x
12", and a gigantic square, 11.75" x 11.75".
One big piece is better than little pieces for a couple of
reasons: First, obviously the day you want to carve a
stamp that's bigger than 4" x 6" square, you're going to need to
find a big piece. But even if all you ever carve are
regular size stamps, you can cut more of them from a large
single sheet with less waste.
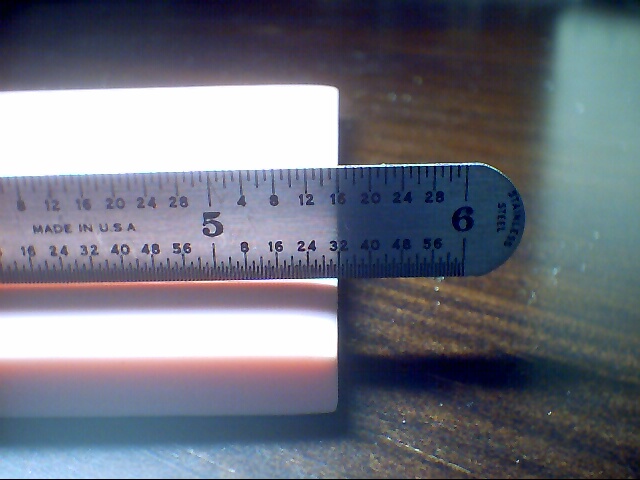
A warning about Speedy-Carve. For making a rubber
stamp, the carving surface of the rubber must be perfectly flat;
any spot that's not flat will cause problems. There is a
defect found in virtually all Speedy-Carve blocks: the
last 1/8" at each end of the 4" x 6" block is unusable because
it tapers off. It
probably has something to do with how they mold the rubber at
the factory. You can put a straightedge on it to check it
out:
You don't want to be trying to make a stamp out of that area
of the rubber; trust me on this. Sometimes you can use the
other side, but usually both sides have the same problem.
Just cut 1/8" off each end and throw it away as soon as you open
the package. So, the 4" x 6" block is really 4" x 5-3/4"
or 23 sq. in. of usable rubber.
The 6" x 12" blocks of Speedy-Carve are evidently taken from the
same run of 6" wide material, just cutting off a 4" chunk or a
12" chunk. Either way, it's the ends of the 6" dimension
that have this taper that should be sliced off.
Speedy-Carve was reformulated in 2013, and the resulting pink
stuff was awful. Sometime later it was reformulated again
and the result was much better, but still nowhere near as nice
as the pre-2013 stuff.
At this point, I once went on to recommend MasterCarve and some
cheap white erasers from a Dollar Tree store. However,
none of these products are available any more. As a
result, Speedy-Carve -- not as good as it once was -- arguably
remains the best locally-available carving material.
There are more options online:
The best carving materials ever were PZ Kut orange and PZ Kut white from Stampeaz.com,
but these are no longer made due to environmental concerns
arising from their production. There now is a replacement
for PZ Kut available from Stampeaz
called Oz. It's not the same as either of the original PZ
Kut products, but it's pretty good stuff. It is very hard;
some people get hand cramps trying to carve it. Your
carving tools will need to be very sharp.
There are Chinese carving materials with no known product name
that are 8mm thick and come in various colors including
multilayered colors, and they're pretty good for carving.
They're reasonably-priced, but shipping can increase the cost
dramatically.
There are Japanese carving materials by Horuvani that are
actually made in Vietnam and are 11mm thick, and the only word
in English on the package is "Seed". They are available in
many colors and in regular and "hard" versions. They are
all excellent, and they are all very soft; the hard is still not
hard enough for most carvers. Unfortunately, they are
kinda pricey, and again the shipping costs can be a
show-stopper.
Considering the cost of gasoline these days, forget driving
around town and just order some good carving material
online. Stampeaz
is a highly
recommended online supplier, being run by a letterboxer, and
offers the Speedball pink stuff, OZ Kut, and the Seed stuff at
excellent prices.
MATERIALS TO AVOID:
Besides the pink Speedy-Carve, Speedball
also makes Speedy-Cut which is 3/8" thick and tan in color and
costs about half what Speedy-Carve costs. Don't buy
Speedy-Cut!
Sure, it's cheap, but carving rubber
stamps is supposed to be enjoyable, not drudgery. And
after you've spent a couple of hours carving, durability will be
far more important to you than the few cents saved on the
rubber. Speedy-Cut is miserable to
carve, and once carved it doesn't hold up well. I have
found stamps made of Speedy-Cut in letterboxes that were
crumbling and falling apart, and one had even hardened into
something that could be mistaken for rock. In fact, I've
even seen Speedy-Cut broken into pieces in the package on the
shelf in the store.
Speedball has another material called Speedy-Cut Easy, and it's
a pretty blue color. Some hypothesize that so many people
were advising to avoid the tan-colored stuff that they changed
the color. The blue stuff is still Speedy-Cut, and it's
still awful.
If you find a Utrecht
art supply store, they carry something called Easy Cut, which
appears to be the same thing as Speedball Speedy-Cut --
interesting, since Utrecht carries Speedball branded
products. Avoid this stuff for the same reasons as the
Speedy-Cut.
If you visit a Hobby Lobby store, you'll find they offer a
material called Moo Carve. The story is that the
manufacturer that was making MasterCarve for Staedtler decided
to offer their own knockoff. Despite being the same size
block as MasterCarve and having a label that looks remarkably
similar at first glance, it is not the same as MasterCarve; it's horrible
stuff, don't waste your money on it.
Hobby Lobby also offers Jack Richeson
Easy-to-Cut Lino that's grey and only
about 1/8" thick. Horrible stuff, avoid it.
Among mail-order products, there's E-Z-Cut from Blick (3/8"
thick, white), which I have never used but others have reported
satisfaction with. Note that Blick also offers something
called Soft-Kut (1/4" thick, gray). I have tried Soft-Kut; it is
horrible stuff to try to carve rubber stamps with. You're
constantly fighting with the knife trying
to get it to move through the rubber.
Don't purchase any linoleum products such as
Nasco
Softoleum. Linoleum is apparently usable for some
sort of block printing but certainly not for carving a rubber
stamp. Linoleum is not suitable for rubber stamp carving
at all.
There's a product from Japan called Gomuban which is a thin
layer of black rubber with a dark blue coating on one side and a
dark green coating on the other. It has the texture of a
refrigerator magnet. It's not particularly good for
carving, but the worst part is that the surfaces are so dark
that it's very difficult to transfer an image onto it and be
able to see it to carve.
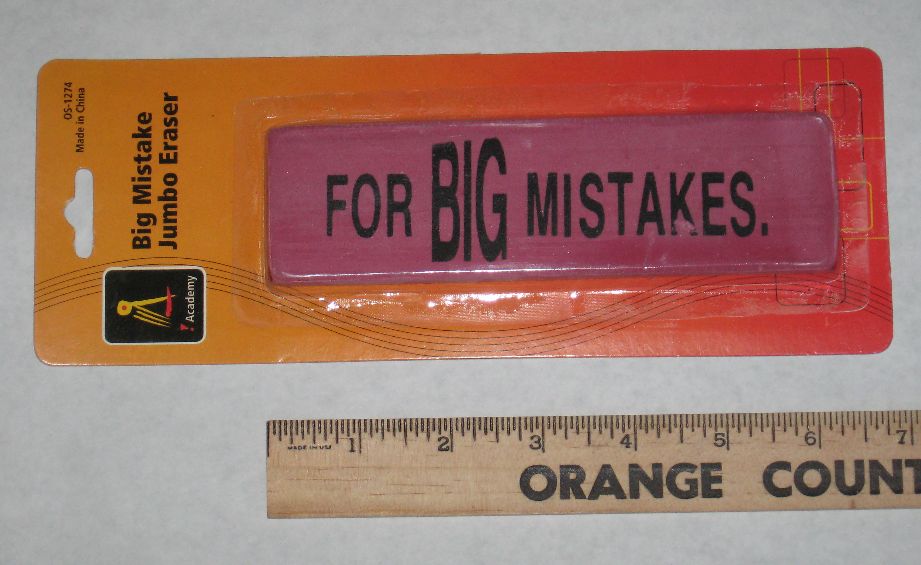
Some people have found something called a "Big Mistakes" eraser,
basically a gag eraser that's huge. They are commonly
found in dollar stores. There are actually several
different types of Big Mistakes eraser; here's one:
This eraser itself is only about 1/4" thick. Even though
it only cost $1, I would never buy another one of these.
For one thing, even though it's rectangular, it's not
well-formed -- there isn't a truly flat side on it! I
ended up cutting some of the worst areas away, and then doing an
acetone scrub (see the Rubber Stamp Blank page)
to create a flat surface for carving. The color is darker
than I'd like, making it difficult to see an image while
carving. The rubber feels gritty, almost like there's sand
in it. It's rather tough to cut. And it seems to
crack easily if bent. After carving one stamp with a piece
of one end, I just threw the rest of the eraser away in
disgust. But for all this, I have to admit that the stamp
I made came out OK and seems to be holding up well.
Here's another Big Mistakes eraser:
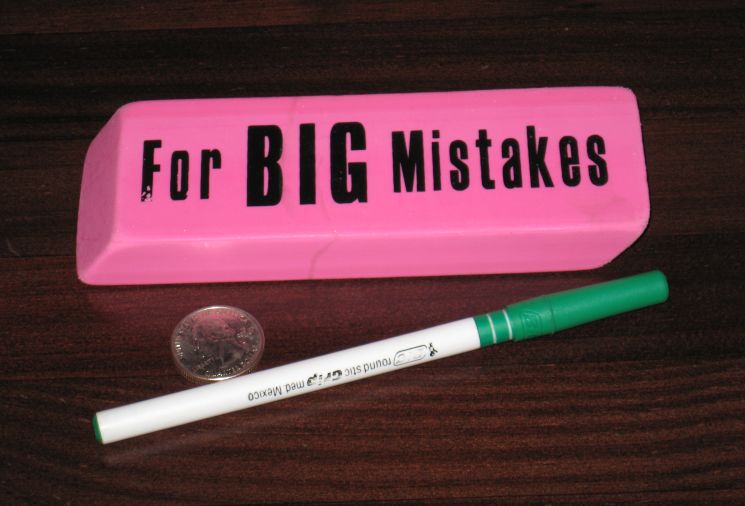
This eraser didn't come in a package per se, it was just wrapped
in cellophane with a white label on the back side. $1 in a
Dollar Tree store. The overall dimensions are 5-3/4" x
1-15/16" x 11/16" thick. This eraser is kinda thick for
rubber stamp use. It seems to weigh about a pound.
But at least the surfaces are reasonably flat to begin with.
A couple of interesting things about this eraser: For one
thing, ironing didn't transfer an image. No idea why;
exactly the same process transfers images to other types of
rubber, but not to this eraser. Also, scrubbing the
surface with acetone doesn't work well; while it smoothes the
surface of other types of rubber, it just caused this stuff to
break away in chunks leaving a cratered surface.
The worst part, though, is that this eraser lacks any semblance
of toughness. You can rub as lightly as you can with your
thumb and you'll be rolling off little strands of rubber.
I would never carve a stamp from this stuff; after about a half
dozen stampings it'll need to be recarved. This entire
eraser got thrown away.
Besides the "Big Mistakes" gag eraser, there are lots of other
erasers out there with a wide range of characteristics.
One challenge is finding erasers large enough for anything but
the smallest stamps, but if a small stamp is what you have in
mind you can always try a Pink Pearl or whatever else you
find. The Dollar Tree sells some ginormous stamps with
illustrations of robots or elephants or whatever on them, and if
you flip them over and work on the blank side they're not
totally horrible to carve. They're still nowhere near as
good as Speedball Speedy-Carve, though, so if you ever hope to
actually enjoy carving I recommend you just buy that.
FOAM
You'll need soft, squishy foam rubber between 1/8" and 1/4"
thick. Old mouse pads work well. Another possible
source of foam is kitchen cabinet liner material; you can buy
enough to make a zillion rubber stamps
for just a couple of bucks. You need to be sure to find
some good quality foam, because cheap foam can rot and fall
apart with age.
Don't use "Fun Foam", which can be found at Walmart or
dollar stores in sheets or in the form of "doorhangers".
You want a foam that will squish when you apply a reasonable
stamping force on it. The Fun Foam is too rigid for this
application; when stamping, the rubber itself is likely to
squish more than the foam.
The foam this carver prefers is foam insulating tape intended
for wrapping pipes. Both Lowe's and
Home Depot carry such foam tape.
This stuff is black, 1/8" thick, 2" wide, and you can buy a
30-foot roll for a few bucks -- enough to make zillions of
rubber stamps with some left over to perhaps wrap some
pipes. It's peel-and-stick on one side, saving you one
application of glue. If 2" isn't wide enough for your
stamp, you could simply apply two pieces side-by-side.
In general, the bigger the stamp, the thicker the foam needs to
be. The foam is there to ensure that a stamper applying
reasonable pressure will cause the entire surface of the rubber
to be pushed into contact with the paper. Presuming the
stamping conditions aren't absolutely perfect -- the paper laid
on a perfectly flat desk -- the foam needs to be soft enough and
thick enough to get the job done. Thin foam is usually
adequate for stamps under 1" square, but if your stamp is 4"
square it'll work better with thicker foam. If all you
have is thin foam, there's no rule that says you can't use two
layers.
WOOD
You'll need a stiff, hard backing, which will serve to
distribute stamping pressure across the face of the stamp as
well as provide a handle for the stamper to grab it with.
The simplest idea: Go down to Lowe's or Home Depot and buy
oak strips 1/4" thick in varying widths, perhaps 1-1/2", 2", and
3". Cut pieces off these boards to make blocks suitable
for backing stamps. You might want to purchase a miter box or miter saw to make the
saw cuts nice and straight; a miter box is cheap, less than $5,
but a miter saw is better. If you get a nice miter saw,
you can use it to cut the block both ways to the exact
dimensions needed rather than being limited to the board widths.
Yeah, I said oak. Really, any hardwood will do, but not
softwoods such as pine. When you're trying to cut the
small blocks of wood you need for this job you'll find that pine
splits and splinters so much that you'll be throwing half of it
out and the pieces you end up using won't look very good.
Pine can also warp and split later, making it difficult to get a
good image from the stamp. Just go ahead and buy hardwood
boards; the cost difference is minimal for the tiny amount of
wood you'll be using.
If you have access to scrap pieces of hardwood, you can use
thicker pieces; it just makes the stamp a bit more bulky.
Good quality wood paneling (for wall covering) is often made of
three layers of wood bonded together to form a sandwich about
1/4" thick, and one small leftover piece from a redecorating
project is enough to make dozens of rubber stamps.
Sometimes
the boxes that cigars come in are made of really fine plywood,
three or five layers in less than a quarter inch of
thickness. I've even used blades from a ceiling fan;
sometimes the fan comes with five blades and you only use
four. You can use metal if you have something suitable.
I happen to have a stock of 1/4" thick hard plastic which works
well. But one thing to remember: Don't use anything
cheap or flimsy. Good quality hardwood can get thoroughly
soaked in a leaky letterbox and come out just fine, while poor
quality plywood will come apart at the seams or split or warp or
whatnot.
If you want to be even more creative, the hard backing is an
opportunity to do something really nice and pretty. You
can use some really nice wood, walnut or cherry. Or you
can use some inlaid wood or some marquetry. Sometimes you
can find some old object made of nice wood that has some pretty
design but is damaged or otherwise ready for the trash, and you
can cut pieces out of it to use with your rubber
stamps. Clean them up, apply a new coat of
polyurethane, whatever. You could pay a trophy store to
laser-cut a design in a piece of fine walnut for you -- perhaps
the same design as the stamp itself! Letterboxers don't
usually go to this level of effort for a rubber
stamp that ends up in a Tupperware container in the
woods (and may turn up missing later on), but if you have other
plans for your rubber stamp
it's something to consider.
GLUE
For bonding the rubber to the foam, you will need glue.
One excellent choice is "headliner adhesive" which is available
in a 16.75 oz. spray can from any auto parts store. Yes, I
said spray can; the stuff is intended to hold headliners up
inside a car, so it comes in a spray can so you can quickly
apply it to a large area. We're applying it to a small
area, which admittedly can be tricky. Headliner adhesive
is a type of contact cement, meaning you apply it to both
surfaces and let it dry before
putting the surfaces together. If you've ever used contact
cement before -- Weldwood is a common product that comes in a
little glass bottle with a brush in the lid -- you already know
what a pain the stuff can be. The brush always ends up
with bristles pointing in many different directions so it just
makes a mess when you try to use it. Then the glue
invariably dries up in the jar before you've used half of
it. The glue in the spray can never dries up; it can sit
on your shelf for years and it'll still be usable. With a
bit of care, you can spray a dollop right in the center of the
area you want to apply it to and then spread it around with a
Q-tip or a popsicle stick. Plus, headliner adhesive is
exceptionally high-quality contact cement because it must stand
up to high temperatures when your car is parked in a sunny
parking lot. Regular contact cements will soften and come
apart under such heat -- which means they also may soften and
come apart if the sun happens to shine on your letterbox.
There are other types of glue that will work. Some people
use Gorilla Glue which is very durable, but you must be careful
to apply a thin, even coat because it expands when it dries and
will cause your rubber stamp to bulge up and not stamp
right. Others use various types of hobby glue, most of
which will work. I just find the headliner adhesive is the
best glue for this job.
Another excellent idea is double-sided carpet tape. Home
Depot sells a product called Rhino Grip for less than $10 for a
75-foot roll of 1-7/8" tape. The way this stuff works is
you stick it down then peel off the backing and throw it
away. What you're leaving is a sticky layer that doesn't
have any tape to it, just the sticky. There are some fine
reinforcing threads, that's all. The headliner adhesive is
cheaper to use, but this stuff has two significant
advantages: 1) It's far less messy; and 2) you can
actually roll a bit of this tape (with the backing) around a
dowel or something and carry it in a pack for repairing stamps
and other things on the trail.
PARCHMENT
Parchment is a type of wrapping material used in cooking.
You can buy it by the roll in a grocery store; it's alongside
the aluminum foil. Sometimes it's available in flat
pieces, and these are better; if you find them, buy them.
We'll be using parchment to transfer images from your computer
printer to the surface of the rubber for carving.
Alternatively, you can buy mylar sheets intended for
drafting. These work better than parchment, but can be
difficult to find; drafting is a lost art.
ACETONE
Acetone is a solvent. You'll find it's very handy
during the rubber stamp making process, so it's a good idea to
have some on hand.
Acetone is the primary ingredient in fingernail polish remover,
so you might already have some on hand. If not, you can
purchase acetone at any place that sells paint, including
Wal-Mart, Lowe's, and Home Depot, in metal cans up to one
gallon. It's not expensive, and once you have some on hand
you'll probably find it useful for other projects as well.
Acetone is highly flammable, and it's also no fun to breathe, so
take appropriate precautions when using.
Navigate to: